
To create the outer walls I used the same process but using the box tool and cloning the wall to create four outer walls.

This gave me the basic look for my castle.

To cut out the arch at the front of the castle I used a Boolean which takes a shape and then inverts it so it takes a shape out of an object instead of creating one. As I wanted a rounded shape I used a sphere shape, Once I chose the correct size I aligned the sphere with the wall I wanted to cut the arch out of using the align tool. When loading the align tool the first thing it asks is what you would like to align the shape with, As I wanted to align it with the wall I selected the front wall.

In the align selection I could pick certain settings for each axis. As I wanted the arch to be in the center of the wall I set the X and Y axis to center, But as I only wanted half of the sphere to be inside the wall I manually set the Z axis by dragging with the mouse. This had my sphere set in the correct position on the wall:

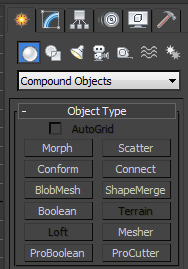
To remove the sphere from the wall I used a Boolean object, This is found under 'Compound Objects' in the create tab.

I then had to select whether to subtract A from B (Wall from Sphere) or B from A (Sphere from Wall.)
As I wanted to remove the sphere from the wall I selected B from A.

This cut out a perfect rounded shape:

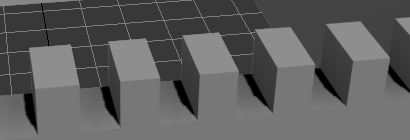
Using the same method I cut out the gaps in the top of each wall but instead of using a sphere shape I used a box tool to cut the shapes out.
Now I had the basic look of a castle.

Next thing to do was to create the tops of the four corner towers.
Using the cone shape gave me the right look for the tips of the towers. When I was happy with the shape of the cone I used the same align tool as before to align the cone with the top of the tower, to get a perfect fit I had to change the diameter of the bottom of the cone so it was exactly the same size as the top of the tower.

Just to add that extra rustic feel to the castle I added two crosses to the front of the castle using the same Boolean effect and align tool I had used previously.

Now the outside of my castle was complete I filled the inside of my castle with more box and cylinder shapes to create the inner part of the castle, again I used the cone shape to create the tops of the towers as well as a pyramid shape to create the top of the square building. The pyramid shape bsaically uses the same idea as the cone shape but the base is square instead of circular.

This gave me my finished castle:

No comments:
Post a Comment